herokuにPhalconをインストールする
今日は、herokuでPhalconを使えるようにしてみたいと思います。
Gitリポジトリの用意
まず、Gitリポジトリを作成します。
$ mkdir phalcon-dev
$ cd phalcon-dev/
$ touch composer.json
$ git init
$ git add -A
$ git commit -m "Initial commit"
herokuアプリの作成
herokuのアプリを作成します。
$ heroku create
composer.jsonを編集します。
composer.json
{
  "require": {
    "php": "~5.5.18"
  }
}
public/info.phpを作成します。
public/info.php
<?php
phpinfo();
Procfileを作成します。
Procfile
web: vendor/bin/heroku-php-apache2 public
Apacheのドキュメントルートをpublicに変更しています。
herokuへのデプロイ
herokuにデプロイします。
Heroku buildpackには、「How to Install Custom PHP Extensions on Heroku 」のhttps://github.com/duythien/heroku-buildpack-phpをforkし最新にしたリポジトリを使用します。
$ heroku config:set BUILDPACK_URL=https://github.com/kenjis/heroku-buildpack-php
$ git add -A
$ git commit -m "Installl Phalcon"
$ git push heroku master
Phalconをコンパイルするため時間がかかります。
…略…
remote: Build complete.
remote: Don't forget to run 'make test'.
remote:
remote: Installing shared extensions:     /app/.heroku/php/lib/php/extensions/no-debug-non-zts-20121212/
remote:
remote: Thanks for compiling Phalcon!
remote: Build succeed: Please restart your web server to complete the installation
remote: important extension phalcon into php.ini
remote: -----> Discovering process types
remote:        Procfile declares types -> (none)
remote:        Default types for PHP   -> web
remote:
remote: -----> Compressing... done, 146.8MB
remote: -----> Launching... done, v4
remote:        https://thawing-garden-1911.herokuapp.com/ deployed to Heroku
remote:
remote: Verifying deploy.... done.
To https://git.heroku.com/thawing-garden-1911.git
 * [new branch]      master -> master
確認
完了したら、phpinfo()ページを開いてみましょう。
$ heroku open info.php
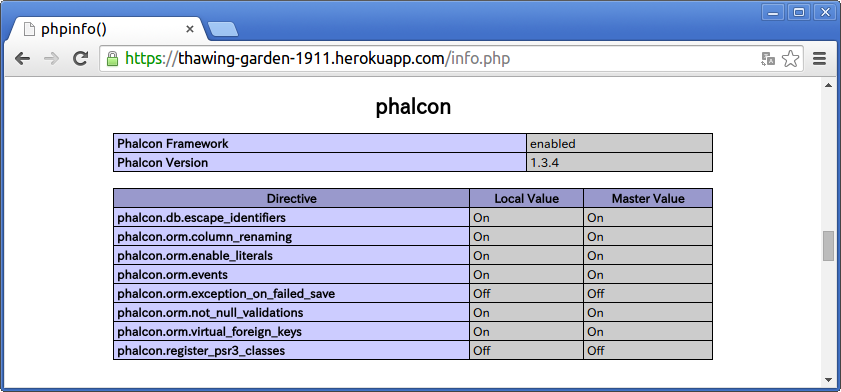
Phalconが有効になっています。
関連
Date: 2014/12/06
 環境構築編")
 入門編")
 実践編")
![徹底攻略PHP5技術者認定[上級]試験問題集 [PJ0-200]対応](http://tatsu-zine.com/images/books/164/cover_s.jpg "徹底攻略PHP5技術者認定[上級]試験問題集 [PJ0-200]対応")

